I understand it's been some time since I last updated this website, college took a priority but now I have to time to continue work on my drones. I'll explain to you my current thought process now.
It's pretty obvious that I am pushing drones to their limits, 19,000ft is not small feat, though I'm not satisfied yet. Both times drones were tested at Kala Patthar they were both met with failures.
I've found that its isn't really the technology limiting the performance of the drone but the frame itself, I find that hardware failure is par for the course at the altitude, at least with the cost goal I've set for myself ($500).
Both times there were hardware failures at Kala Patthar I was unable to change out the parts. This is because I only had around 45 minutes each time and it would've taken too long to switch out parts. This was made worse, not better with the creation of the octacopter, which also was 100% over my cost goal.
After returning from Nepal I decided I was going to drop the octacopter idea all together, cost and repairablity seemed like unfixable issues. The benefits of more sensors just aren't as appearent.
I have been designing a new frame with clear goals to keep me on track, which include:
- Cost - I want it to be accessible to anyone who wants to work with the frame, the only limitation is the amount of plastic that the 3D printer use.
- Simplicity - even a novice drone enthusiast should be able to assemble and repair the drone with little experience necessary
- Repairability - I want to change out broken parts quickly in order to allow for multiple test to be conducted in a short amount of time.
I'll show you step by step what I've done to achieve these goals, all the designs are tentative and are subject to change. This was used in an Afinia H800
The plates were designed by the Kashmir World Foundation, I am repurposing them to more easily change out parts if there is somehow a faliure
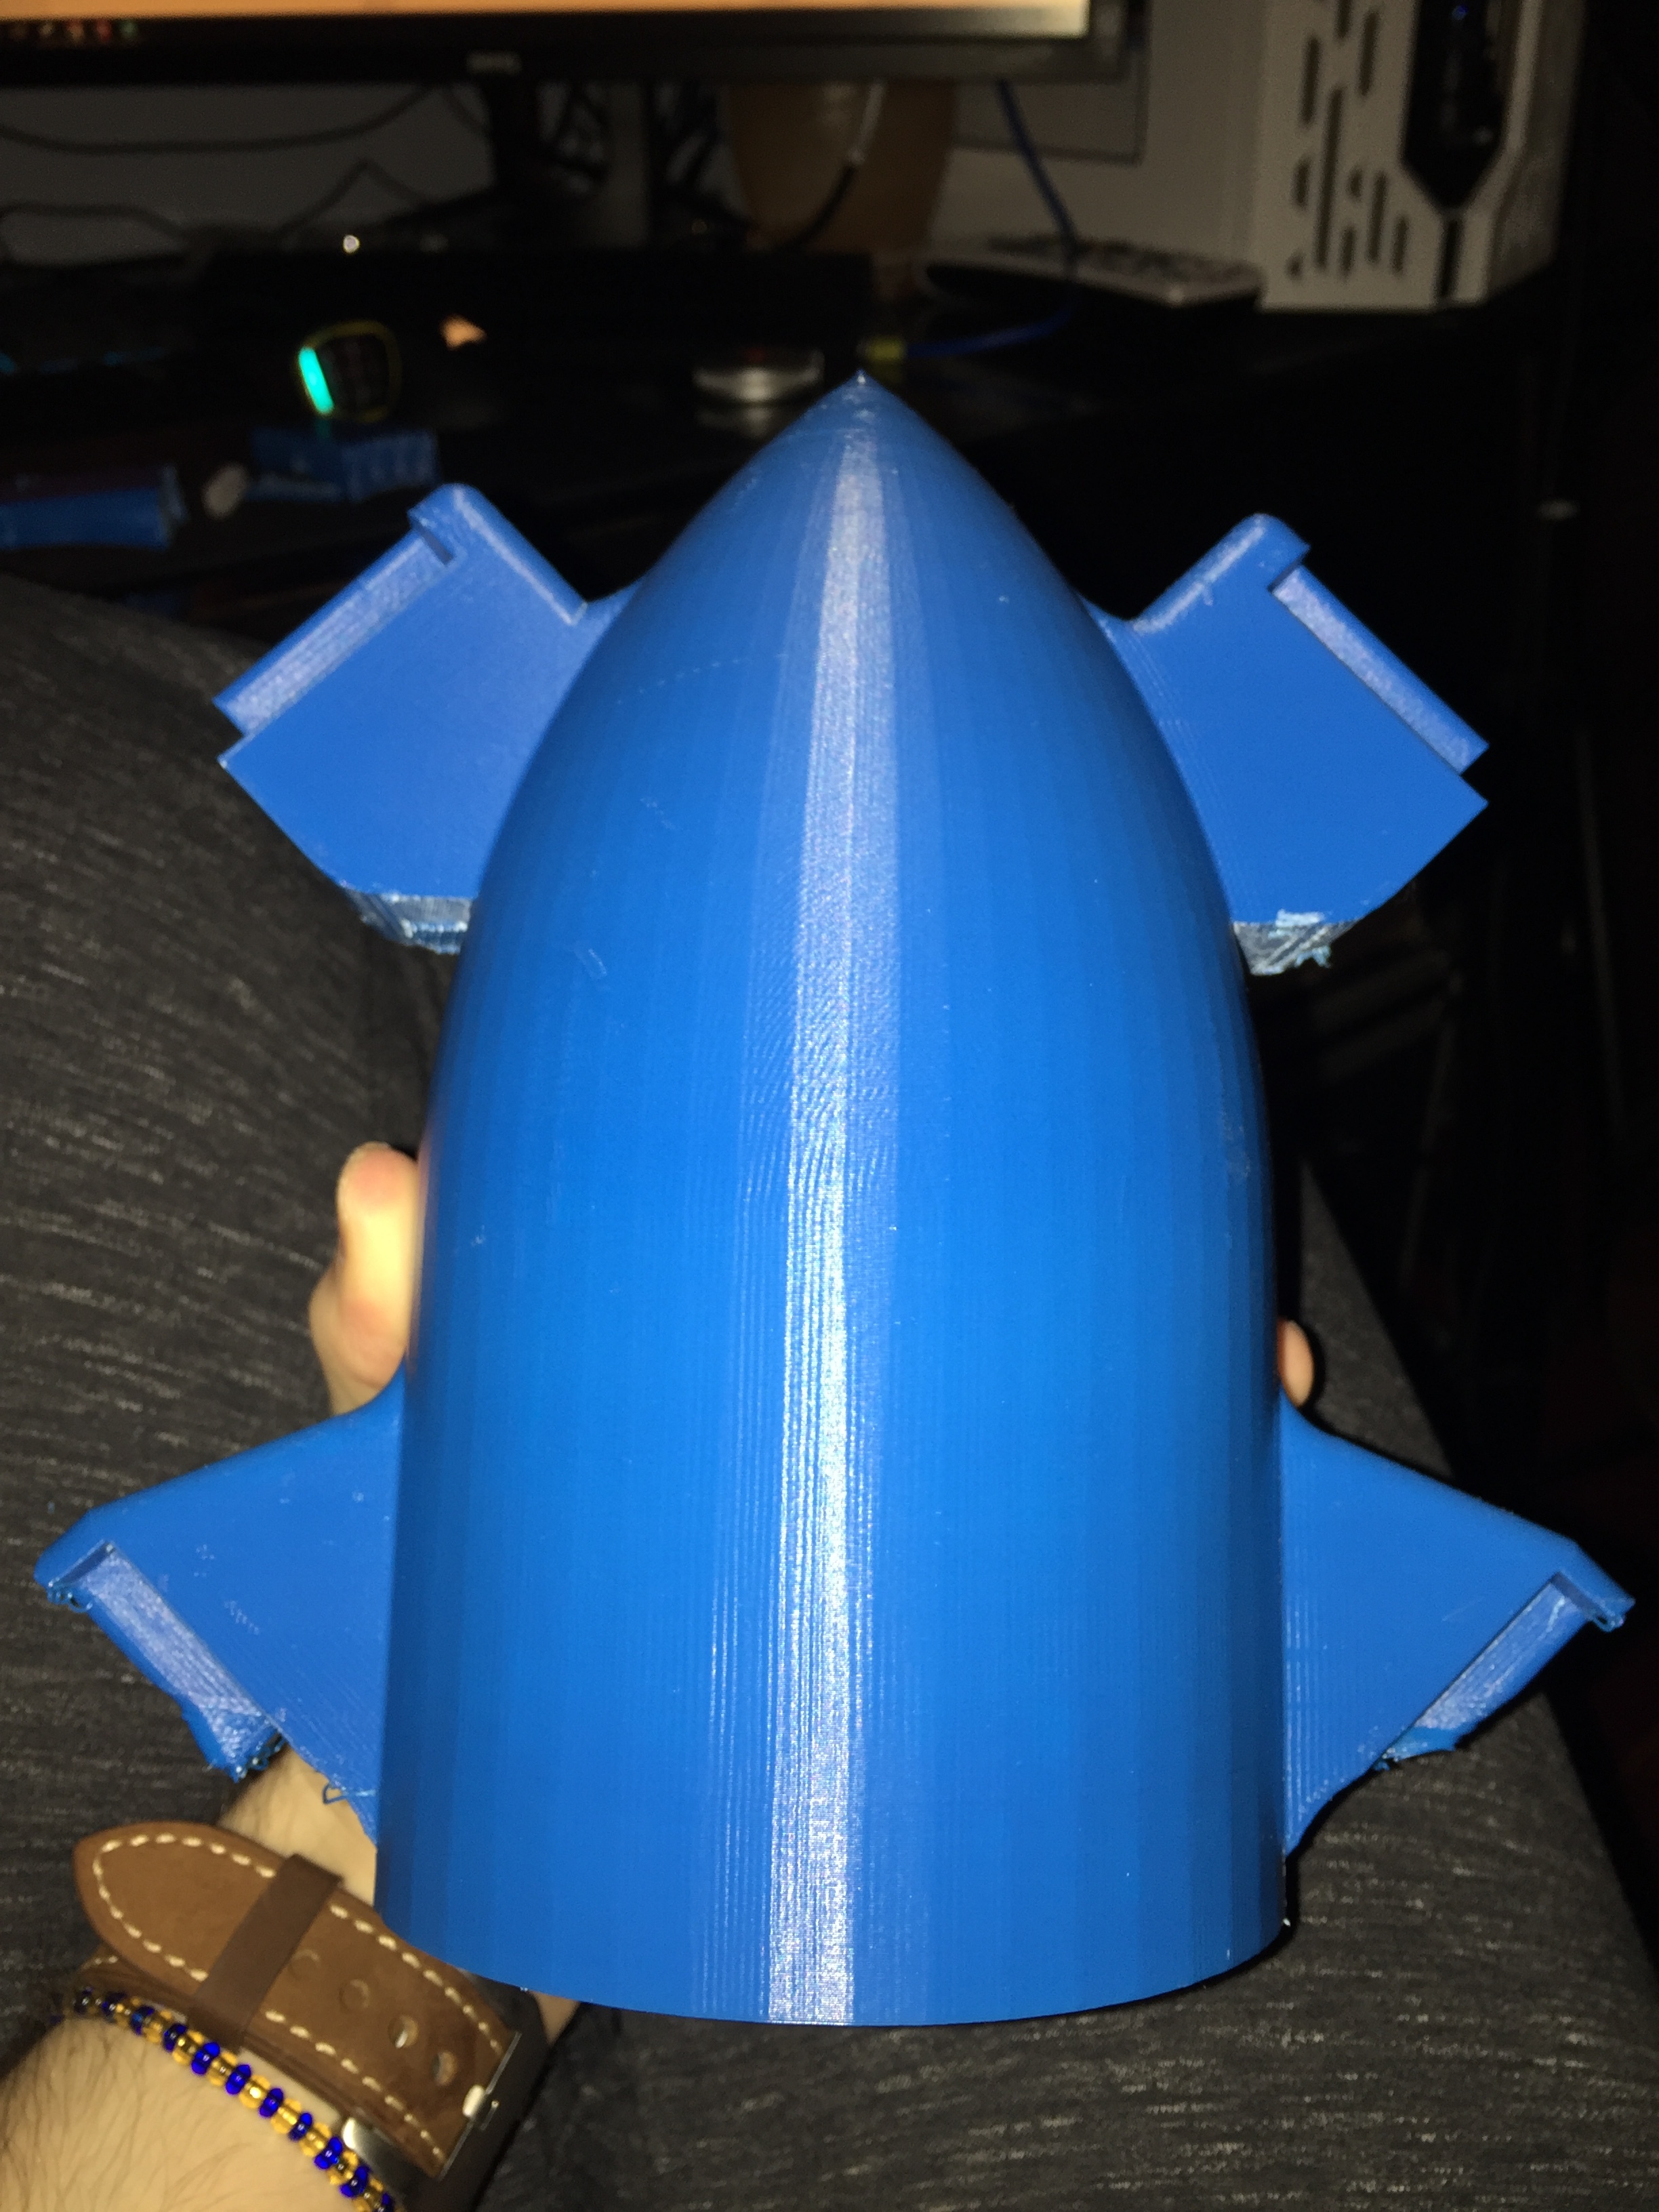

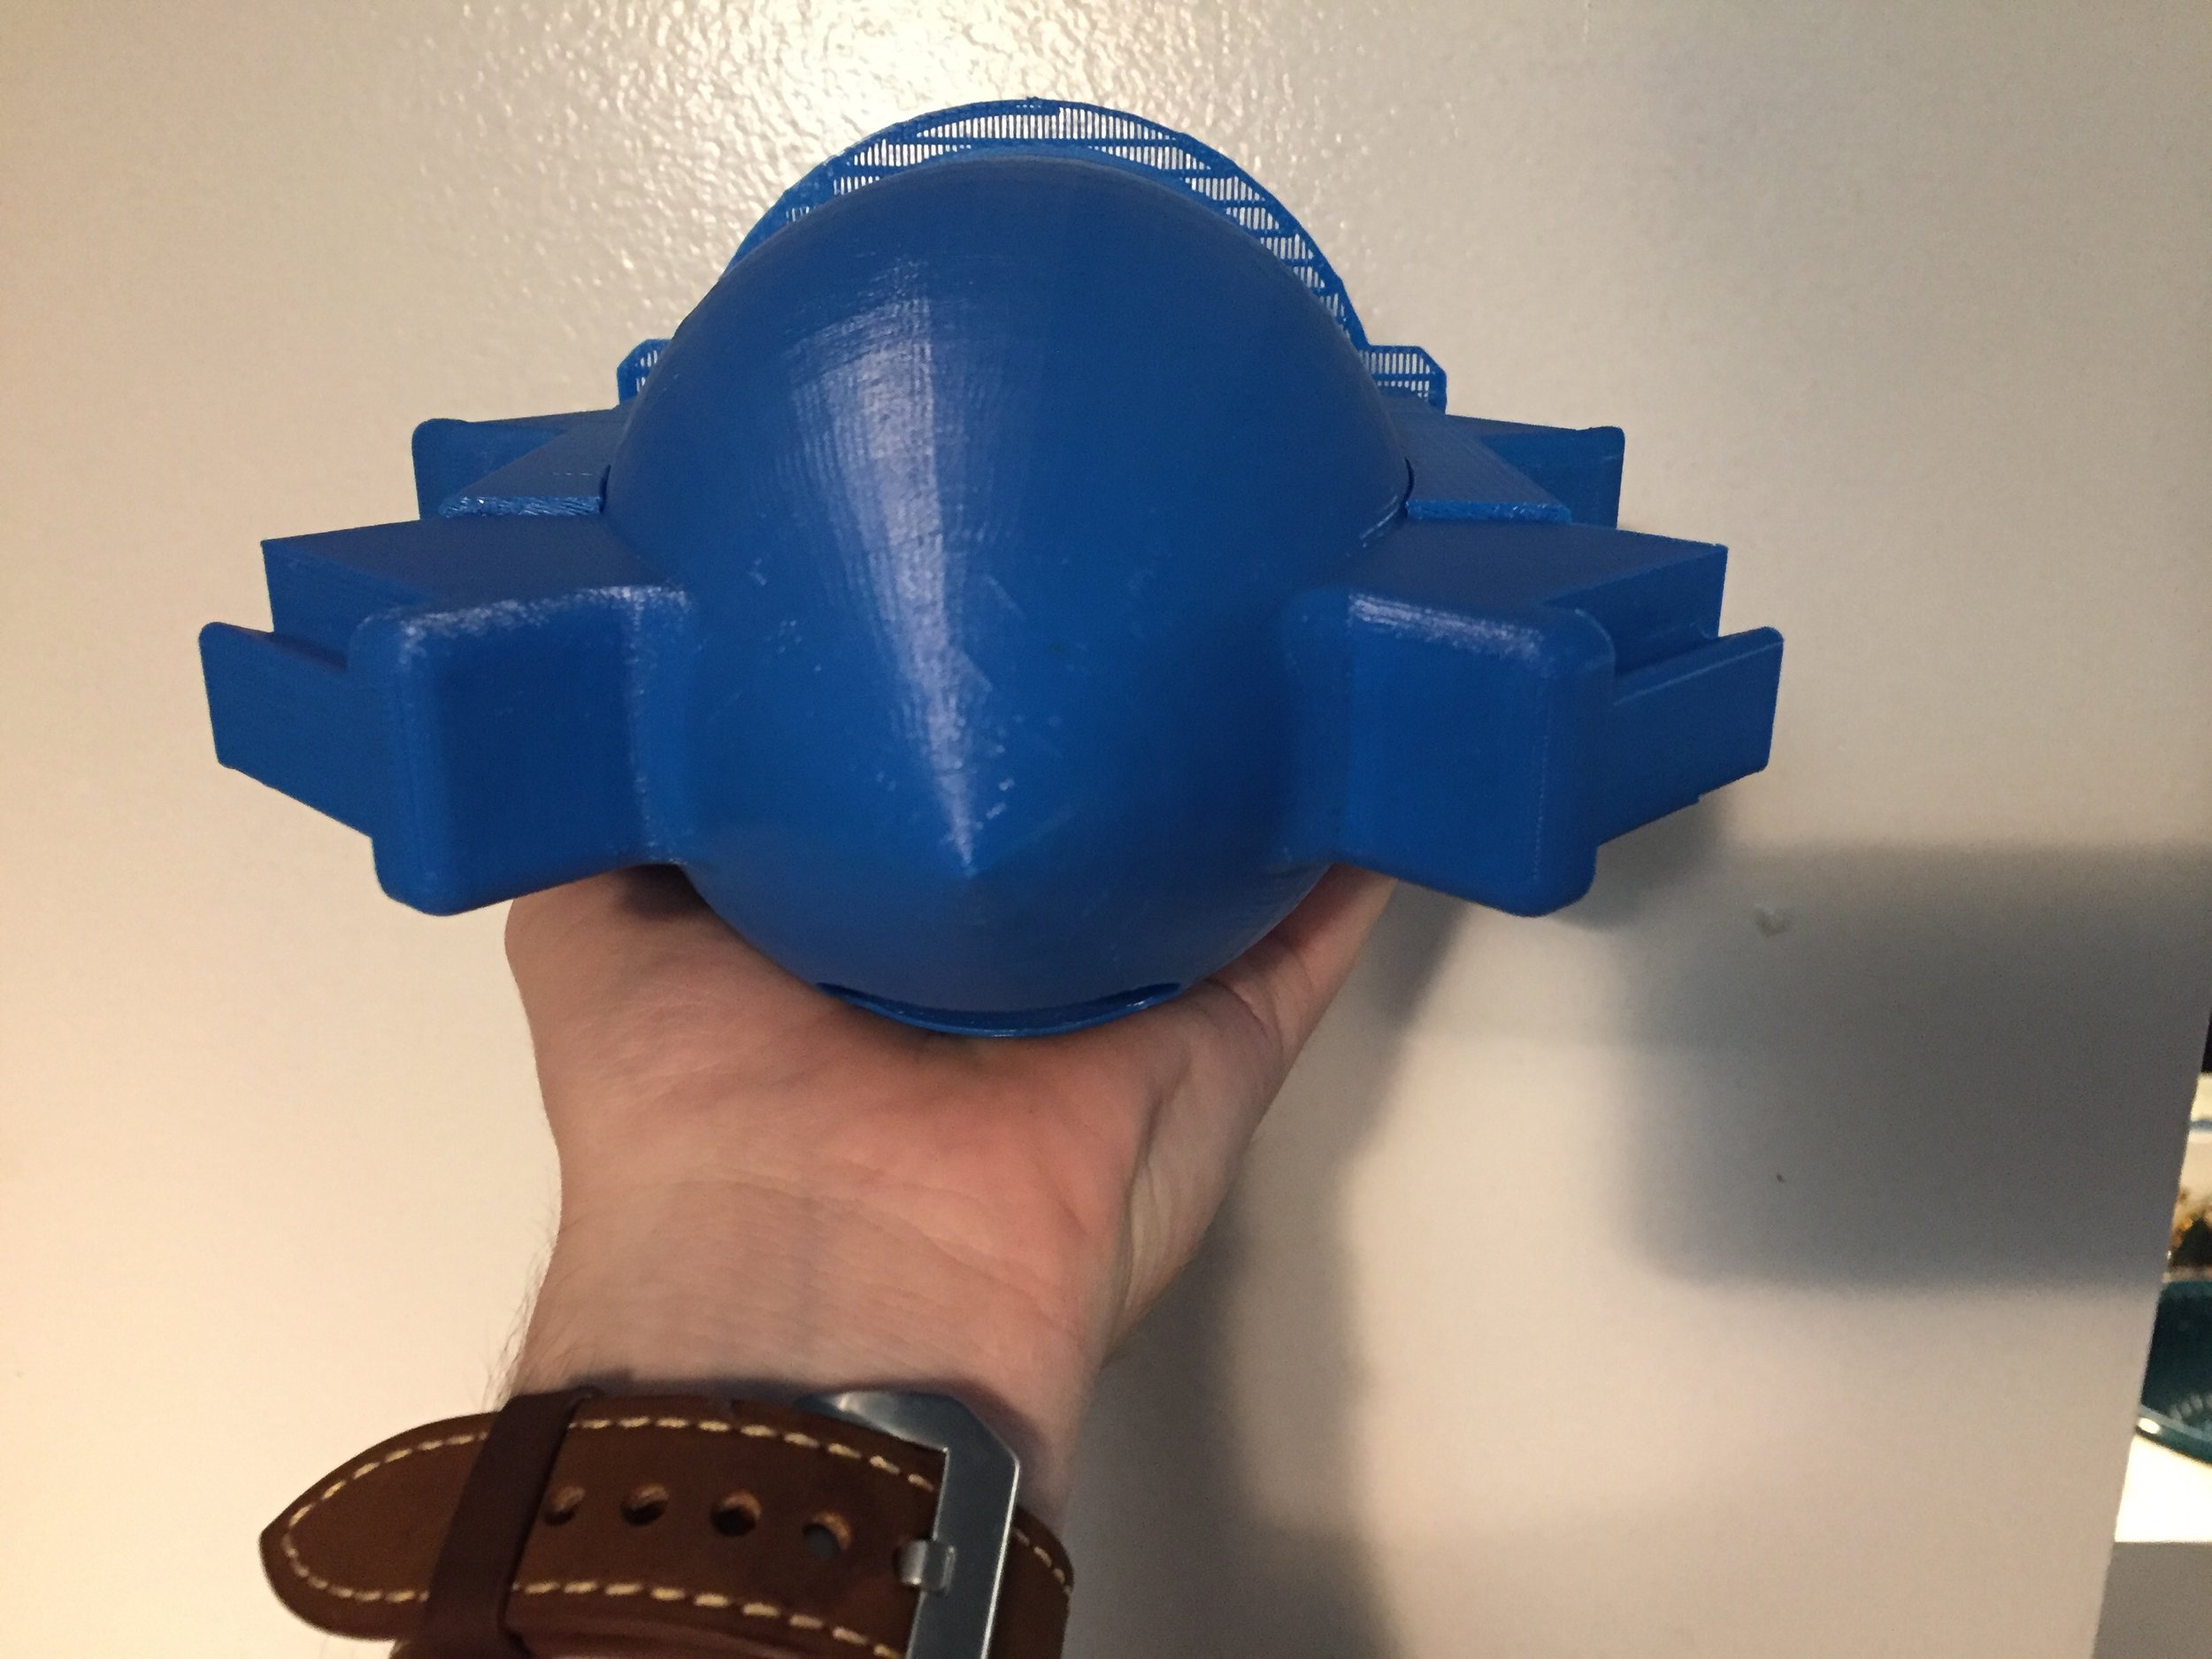
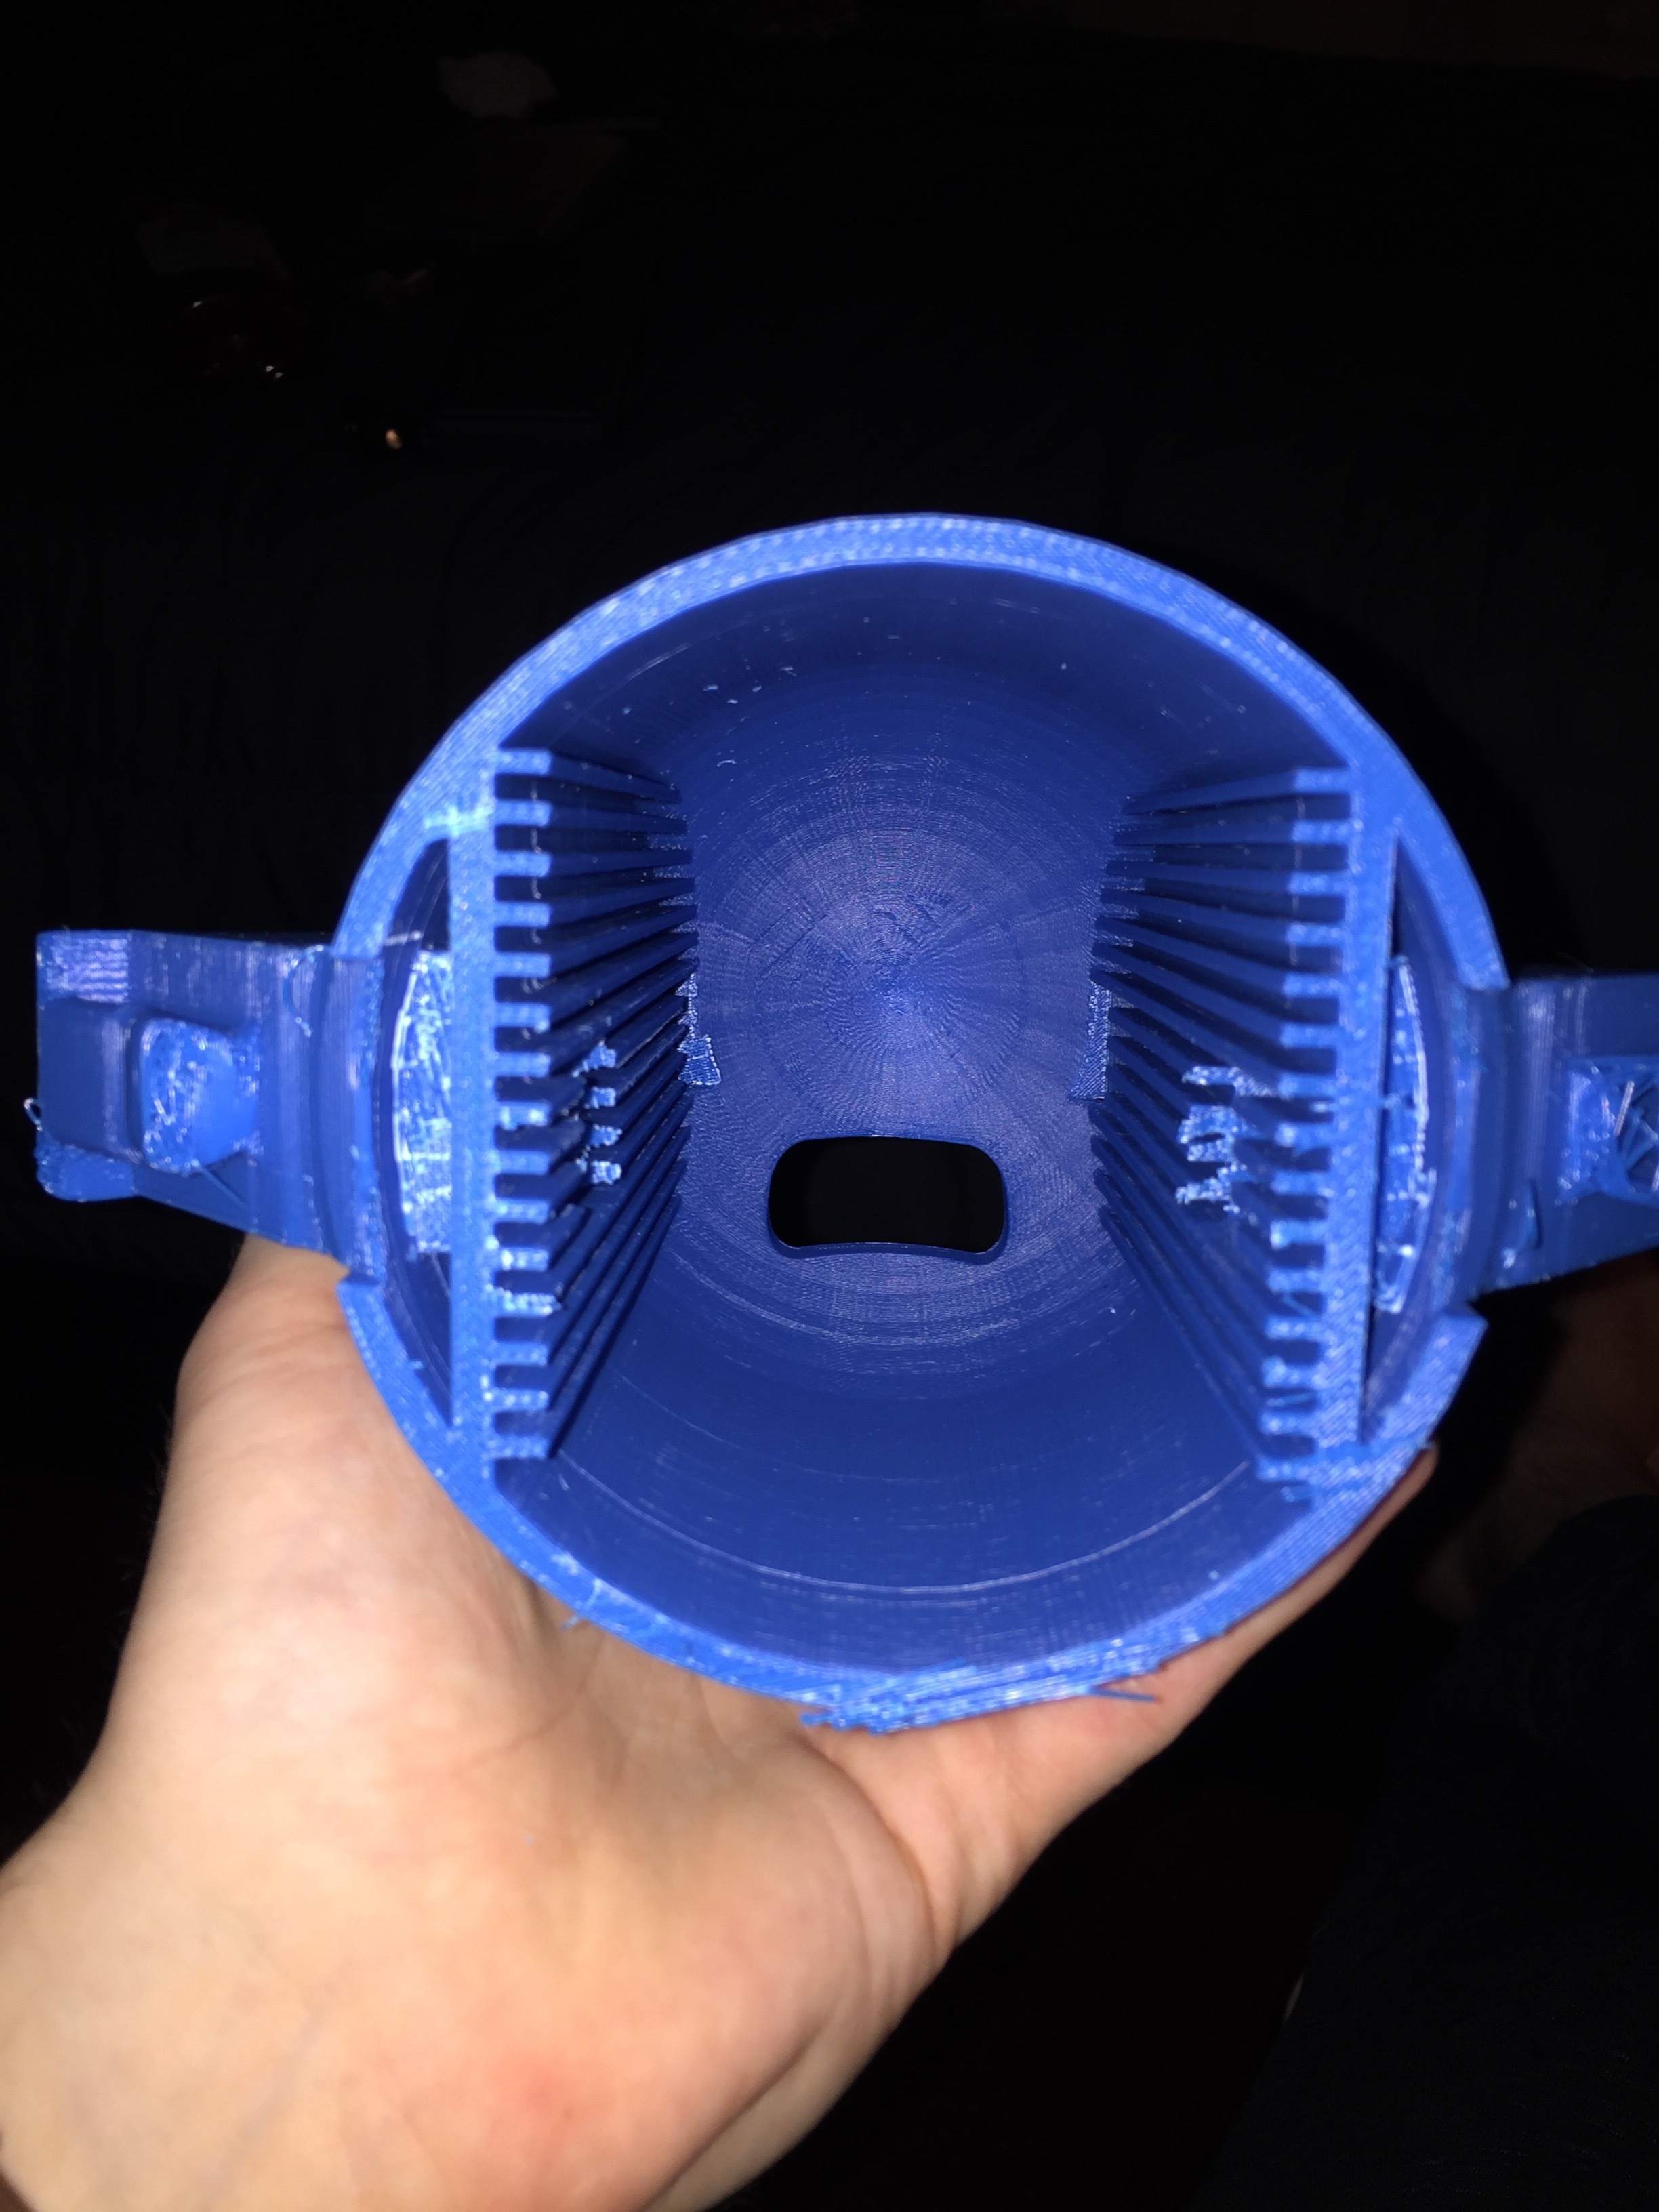
This is the core, this will hold all the plates that are needed to fly the drone. as you can see the plates slide onto rails which allow them to be removed or swapped without the use of tools. The front of the drone is pointed so that a pilot looking from the distance can more easily tell which way is the front. I designed this in Solidworks and printed it in my Afinia printer. Estimated cost is $18 using PLA plastic. Currently the design is for a quad copter but I plan to make a hex attachment later.


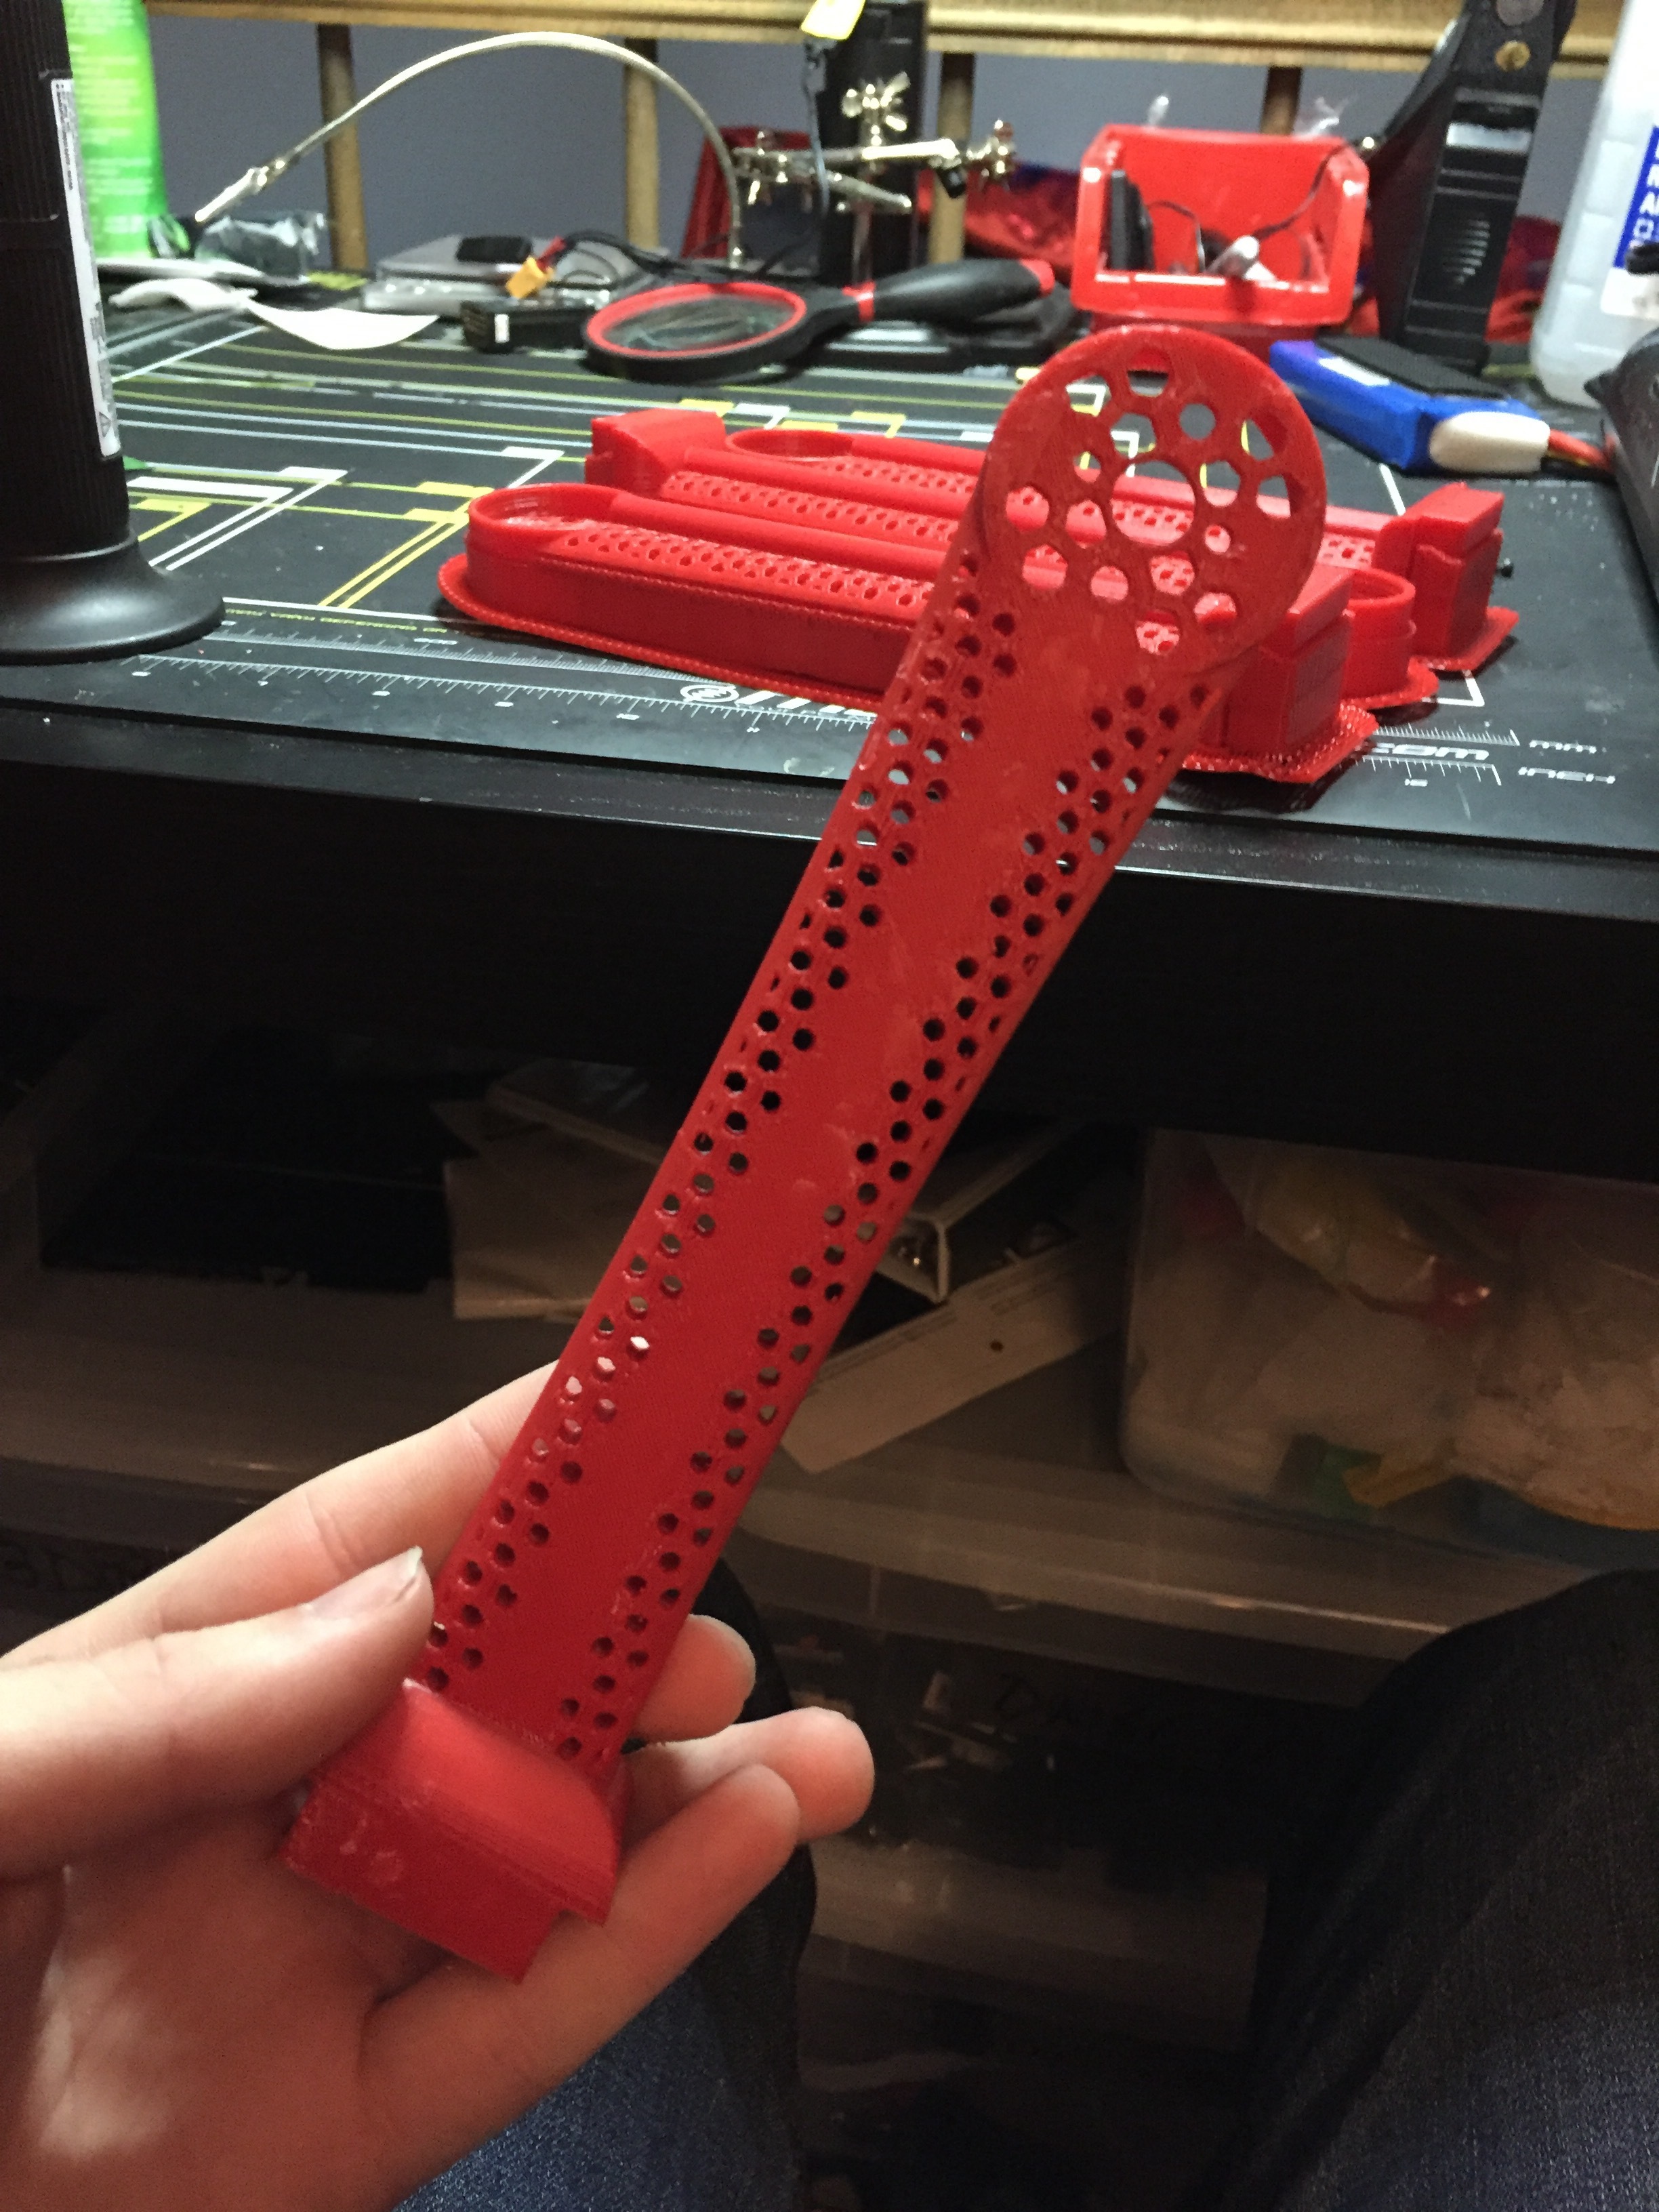


The arms were also designed by me, they're lighter and stronger (based on my stress tests) then the current arms provided. The connect to the core using puzzle piece connectors. They can be quickly swapped due to the use of bullet connectors for power and dupont connectors for data. The nice part is that I can print out all four arms at once, estimated cost $10.

The connector looks a bit like a puzzle piece, I designed it like this to include a triangular shap to prevent faliure from high torque stresses (crashing). I made it to be simple so that making new parts to attach to the connector is not too much of a head ache.
I plan to make more frequent updates now that I have time. This drone is a long way from completion, I need to make a back for the core and make mounting points for sensors. I really think this design meets all of the goals I set out for myself and look forward to showing you in the future.
Let me know,
Michael Kronmiller